Well, it has been over a year since I last had a customer with a corrupted database problem. Which means that I guess I was overdue. And what problem it is.
My customer is reporting that they now get the following error on their iPad when they try to do something with their database:
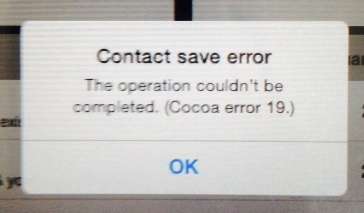
Just in case you can’t read the text in the photo, it says:
The operation couldn’t be completed. (Cocoa error 19).
After some trouble getting the file (it is over 4 GB, not easy to e-mail), I saw a bunch of errors pop up in my debug console, including the dreaded “The database disk image is malformed”, which to me indicated that I needed to try and repair the database file. So I punched up my blog post from February of last year to try and run a repair on it.
Unfortunately, I ran into one dead end after another. I was able to dump the data out of the original database file, which produced a text file of over 8 GB. However, no matter what I tried to do to import this data back into a new database, I would end up with an empty new database.
On a lark, I decided to switch to Windows to try and fix the database file. After downloading the tools from the SQLite web site, Here is what I ended up with on my Windows computer:
C:\database>dir
 Volume in drive C is Windows7_OS
 Volume Serial Number is 50B0-39AA

 Directory of C:\database

03/14/2014  06:27 PM    <DIR>          .
03/14/2014  06:27 PM    <DIR>          ..
03/14/2014  06:16 PM     4,251,181,056 DB.sqlite
03/11/2014  11:33 AM           536,064 sqlite3.exe
03/11/2014  11:34 AM         1,388,032 sqlite3_analyzer.exe
               3 File(s)  4,253,105,152 bytes
2 Dir(s) 240,466,235,392 bytes free |
C:\database>dir
Volume in drive C is Windows7_OS
Volume Serial Number is 50B0-39AA
Directory of C:\database
03/14/2014 06:27 PM <DIR> .
03/14/2014 06:27 PM <DIR> ..
03/14/2014 06:16 PM 4,251,181,056 DB.sqlite
03/11/2014 11:33 AM 536,064 sqlite3.exe
03/11/2014 11:34 AM 1,388,032 sqlite3_analyzer.exe
3 File(s) 4,253,105,152 bytes
2 Dir(s) 240,466,235,392 bytes free
So I fired up a command prompt and tried to run some SQLite commands:
C:\database>sqlite3
SQLite version 3.8.4.1 2014-03-11 15:27:36
Enter ".help" for usage hints.
Connected to a transient in-memory database.
Use ".open FILENAME" to reopen on a persistent database.
sqlite> .open DB.sqlite
sqlite> .tables
.
.
Some table names listed here
.
.
sqlite> pragma integrity_check;
*** in database main ***
On tree page 1033353 cell 0: Failed to read ptrmap key=-280958431
On tree page 1033353 cell 0: 152 of 407 pages missing from overflow list starting at 1037333
Page 1037588 is never used
Page 1037589 is never used
.
.
You get the idea...
.
.
Page 1037684 is never used
Page 1037685 is never used |
C:\database>sqlite3
SQLite version 3.8.4.1 2014-03-11 15:27:36
Enter ".help" for usage hints.
Connected to a transient in-memory database.
Use ".open FILENAME" to reopen on a persistent database.
sqlite> .open DB.sqlite
sqlite> .tables
.
.
Some table names listed here
.
.
sqlite> pragma integrity_check;
*** in database main ***
On tree page 1033353 cell 0: Failed to read ptrmap key=-280958431
On tree page 1033353 cell 0: 152 of 407 pages missing from overflow list starting at 1037333
Page 1037588 is never used
Page 1037589 is never used
.
.
You get the idea...
.
.
Page 1037684 is never used
Page 1037685 is never used
After going through the series of steps that I outlined in my message from last year, it appeared to process the 8 GB text file into a new database that was almost the same size as the original database file. Here was what my directory then looked like:
C:\database>dir
 Volume in drive C is Windows7_OS
 Volume Serial Number is 50B0-39AA

 Directory of C:\database

03/14/2014  06:45 PM    <DIR>          .
03/14/2014  06:45 PM    <DIR>          ..
03/14/2014  06:41 PM     8,428,761,778 dump_all.sql
03/14/2014  06:16 PM     4,251,181,056 DB.sqlite
03/14/2014  06:45 PM     4,239,932,416 DB2.sqlite
03/11/2014  11:33 AM           536,064 sqlite3.exe
03/11/2014  11:34 AM         1,388,032 sqlite3_analyzer.exe
               5 File(s) 16,921,799,346 bytes
2 Dir(s) 227,795,791,872 bytes free |
C:\database>dir
Volume in drive C is Windows7_OS
Volume Serial Number is 50B0-39AA
Directory of C:\database
03/14/2014 06:45 PM <DIR> .
03/14/2014 06:45 PM <DIR> ..
03/14/2014 06:41 PM 8,428,761,778 dump_all.sql
03/14/2014 06:16 PM 4,251,181,056 DB.sqlite
03/14/2014 06:45 PM 4,239,932,416 DB2.sqlite
03/11/2014 11:33 AM 536,064 sqlite3.exe
03/11/2014 11:34 AM 1,388,032 sqlite3_analyzer.exe
5 File(s) 16,921,799,346 bytes
2 Dir(s) 227,795,791,872 bytes free
This had me feeling pretty good. Just to check, here is what I did next:
C:\database>sqlite3 DB2.sqlite
SQLite version 3.8.4.1 2014-03-11 15:27:36
Enter ".help" for usage hints.
sqlite> .tables
.
.
Some table names listed here
.
.
sqlite> select count(*) from table_name;
8716
sqlite> pragma integrity_check;
ok
sqlite> vacuum;
sqlite> .exit |
C:\database>sqlite3 DB2.sqlite
SQLite version 3.8.4.1 2014-03-11 15:27:36
Enter ".help" for usage hints.
sqlite> .tables
.
.
Some table names listed here
.
.
sqlite> select count(*) from table_name;
8716
sqlite> pragma integrity_check;
ok
sqlite> vacuum;
sqlite> .exit
It looks like success. I will have to take this data file and put it back on one of my test iPads when I get back into the office and try it out.
BTW, Happy Pi Day to everyone out there, whether you are a math person or not.
ADDENDUM: After putting the rebuilt SQLite database file back onto my own test iPad and simulator, it worked fine with no issues or cryptic error messages.